Snapshot 30: Learn how to take better photos with your smartphone.
Included in this class:
– Fun daily photo challenges for 30 days.
– Tons of app reviews so you know what is worth your time and what isn’t
– Tips and tricks for how to take sensational photos with your smartphone
*If you don’t have a smartphone you can still participate in the challenges with a regular camera. The tips and tricks should be useful to you as well. 🙂
Sign up for this class here (if you haven’t already done so)
Each day for 30 days you will receive an email with that day’s challenge, tips & tricks and app reviews. Only the emails will have certain tips and tricks & bonus challenges – so that is the perk for signing up for them 🙂
Also I have decided to give away a couple prizes!
2 class participants will get a spot in my upcoming brand new techniques class: Techniques 104 – debuting in December! Also they will get access to my 3 other Technique classes (101, 102, and 103).
How to win:
All you need to do is participate in this class 🙂 Easy right? For every comment, question, or photo that you share with us you get one entry. So the more you participate, the better chance you have of winning! You can comment/post on our facebook page, the actual Snapshot 30 post of the day on the Homeketeers site, on a Snapshot 30 related post on my site, or through Instagram (each time you tag us).
Ready to get started for today? If you have any questions please comment below on this post, and chances are if you are wondering about something, then someone else is too 🙂
Today’s Lesson:
Because it is quite vast and we will be using it a lot in this class, we’re going to spend another day with Instagram – woo! If you missed yesterday’s post introducing Instagram (IG), you can read it here
So now you know how to do the basics in IG right? You can take a photo, crop it, add a filter and a frame, and use hashtags. #Awesomeness! 🙂 (that was a little cheesy, I apologize)
Today I want to show you a couple other cool things you can do with IG, and I have some screen shots to help me explain it better.
Tilt Shift. I admit I went to Wikipedia for help on explaining this one to you, so here is the Wikipedia definition:
Tilt–shift photography is the use of camera movements on small- and medium-format cameras, and sometimes specifically refers to the use of tilt for selective focus, often for simulating a miniature scene. Sometimes the term is used when the shallow depth of field is simulated with digital post-processing; the name may derive from the tilt–shift lens normally required when the effect is produced optically.
I find it pretty cool that we can achieve this effect right inside IG and it’s actually super easy to find in the edit mode – look for the little tear drop shape (directly above the filters). See it?

Click on that, and you’ll see either a little circle appear on the tear drop or a little line like the photo above. Each one gives you a different option. The circle gives you the radial tilt and the line gives you the linear tilt.
I want you to play around with both of them and choose which one you like best to go with your photo. I choose the linear tilt for mine. Now look at the photo below – the white area is what is going to be blurred. It appears like this while you are editing, and all you need to do is swipe your finger to move it around. I put examples of both options below to compare.

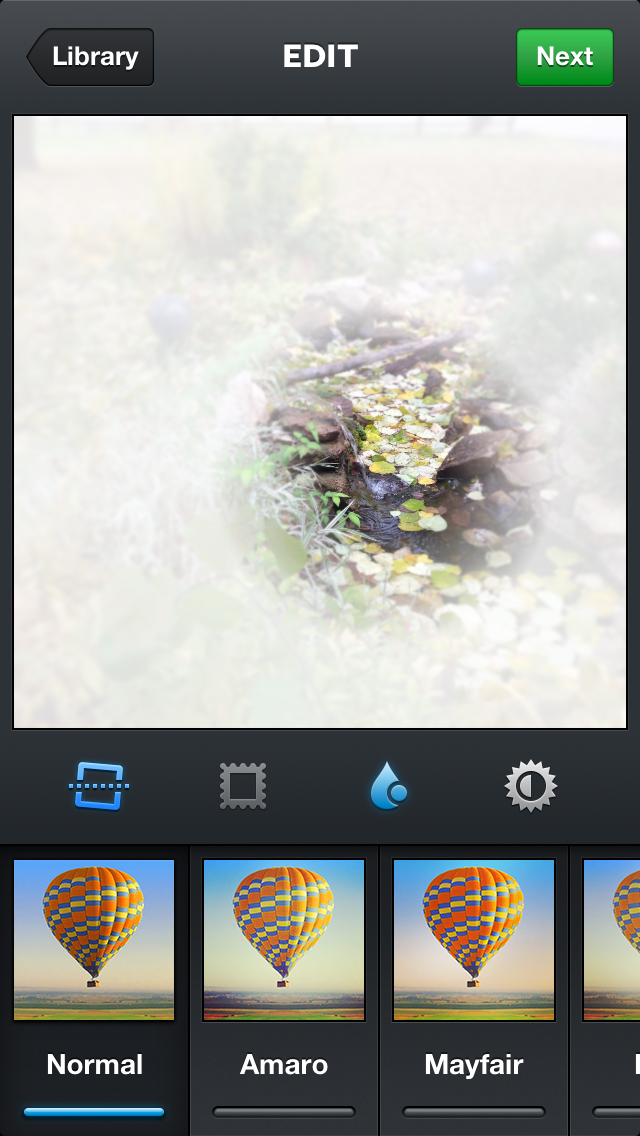
And now the final product: The middle of the photo is highlighted and the rest is blurred out.
Your photo challenge today is:
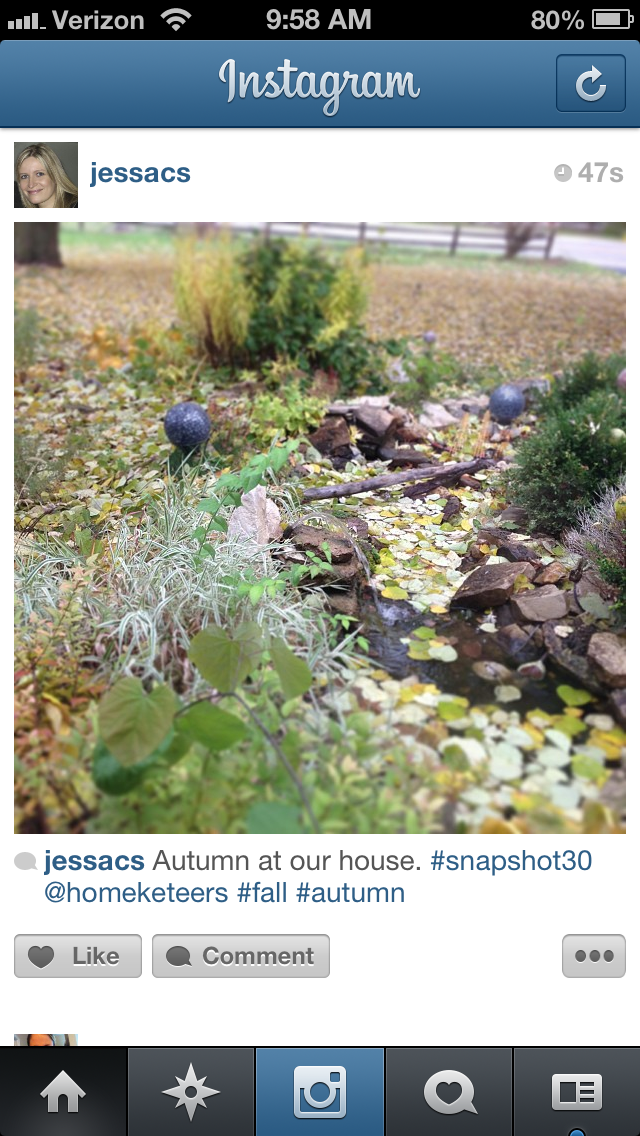
Take a photo of whatever is outside your living room window. That’s mine up there in the example and that was just taken this morning. Fall has indeed arrived here in Illinois.
Part 2 of your challenge for today:
After you post your photo to IG, post it to facebook (you can post on your own page and tag us or you can post directly onto homeketeers page)
How to post to facebook from IG: Look at the photo above and find the button with the 3 dots: … (it is to the right of the comment button. Click on it and it brings this page up:
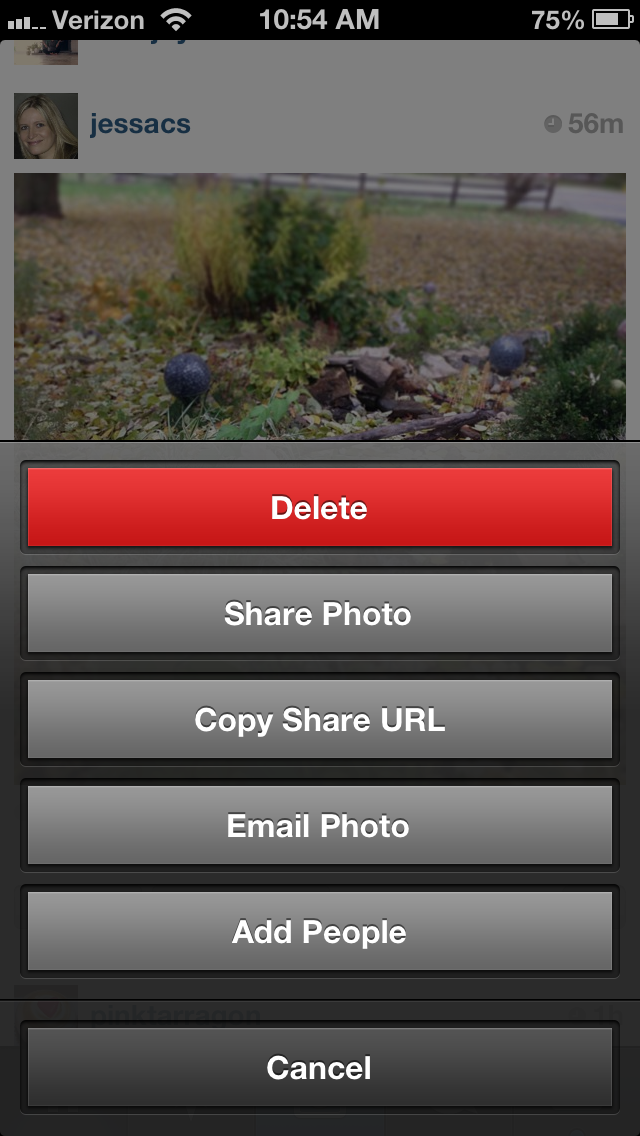
Click on the 2nd button : Share Photo
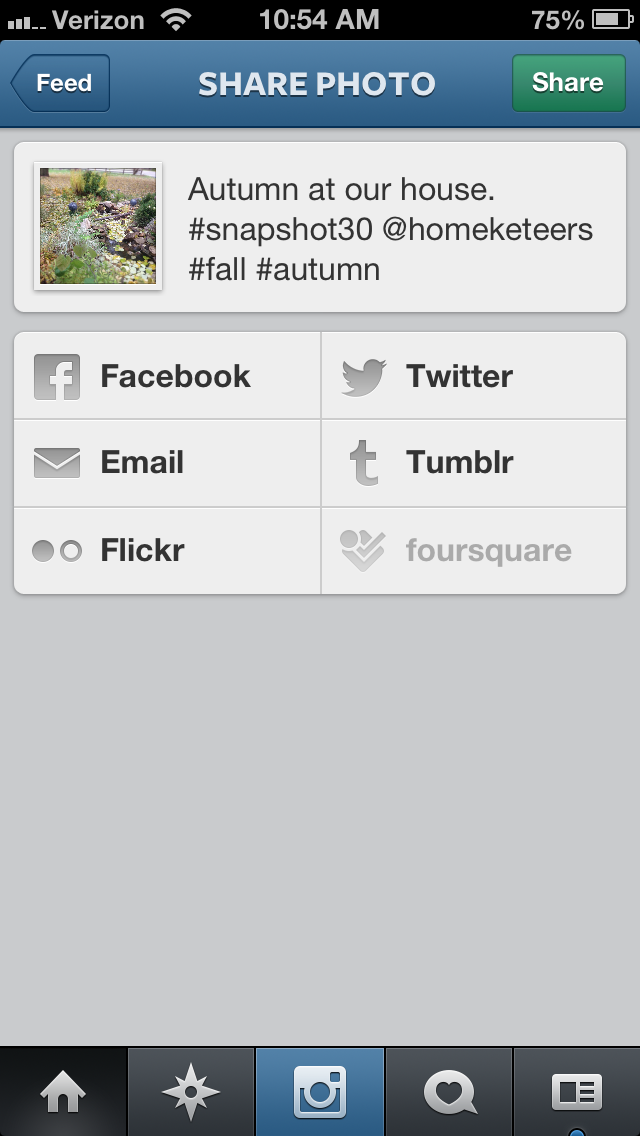
Then click on “Facebook” and there you go! You can also post to Twitter or email the photo directly to someone as well from this same screen.
Don’t forget to tag us so we can see your photo too! (@jessacs & @homeketeers) and #snapshot30. You can also post your photo on our facebook page for everyone to see. (and you’ll get bonus entries into the contest!). I’ll also be playing along so you can see my daily challenge photos on my blog and also my Instagram account.
Make sure you read today’s email: I’ve added some bonus challenges for you 🙂
Please leave any comments or questions below and I will be sure to answer right away 🙂
I don’t have a Facebook account. Will I still be able to participate?
Of course you can 🙂 You can just post any questions or comments right in the post here 🙂
The sky outside?? Its.. black… I think Ill just have to do it tomorrow 🙂
I am on my phone right now (iPhone), trying to share my photo onto your Facebook page. I have already tagged you in it and done the #snapshot30. I have clicked on the three dots to share it, but I think that that will only share it to my Facebook page. Do I need to share it via my computer, or is there a quick way to do it on my phone?
Hi Dory
Yes when posting from Instagram, it will post the photo directly to your facebook page. Once you get to your computer, you can share that photo onto our Homeketeers page 🙂
Thanks for the explanation. I always wondered what that did. I’ll have to take my pictures tomorrow when it’s sunny again. My little guy has croup, so I’m a little behind.