Supplies needed:
-computer
-white cardstock
-trimmer
-mini clipboard (6×9)
-modge podge (glossy)
-paint & brush/sponge
-adhesive
-scissors
-ribbon
-misc. embellishments

Step 1:
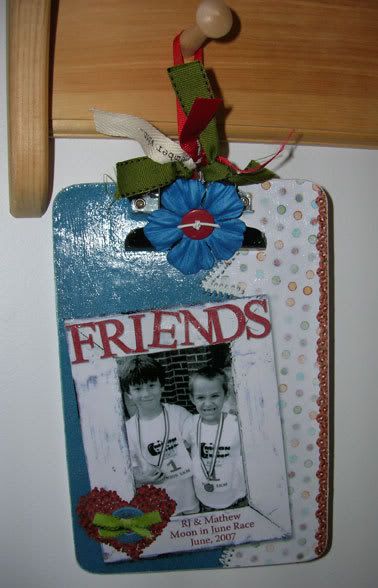
The first thing you need to do is create the image you want for the front of the clipboard..a mini layout so to speak. I used Traci Reed’s Urban Vintage kit and the alphas from her Hello Sunshine collab. kit. I created a 6×9 layout in Photoshop and then printed it out on white cardstock.

Step 2:
Next make a template to use for cutting out around the clip part of the clipboard. I have bad luck with messing things like this up so to be sure making a template was a good idea. 
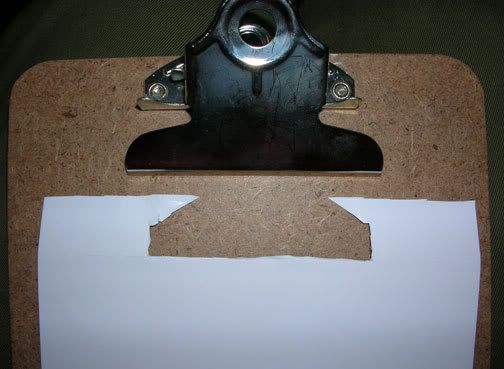
Ya it looks a bit messy but its just a template so no need to worry. Place the template over the back of your cardstock and trace around where you cut the template. Before you cut be sure to double check that your lines will match up with the clip. Trim around the edges of your paper as well to get them rounded like the clipboard.
Step 3:
The next step is to paint the back of your clipboard. You don’t HAVE to, you can leave it the way it is or you could cover it with paper as well. With this step make sure you use a lot of pain on your brush or sponge and try to use long even strokes so it looks nice when it dries.
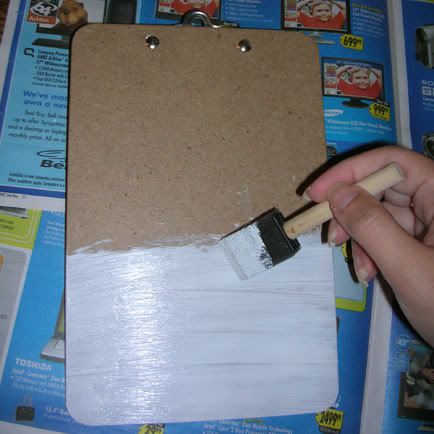
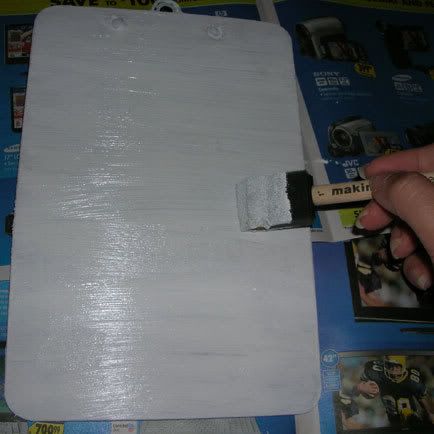
Now you wait for it to dry. This could take a while depending on how much paint you used. Make sure you do not touch it until it is completely dry or you will see your fingerprints in the paint. PATIENCE! it will dry.
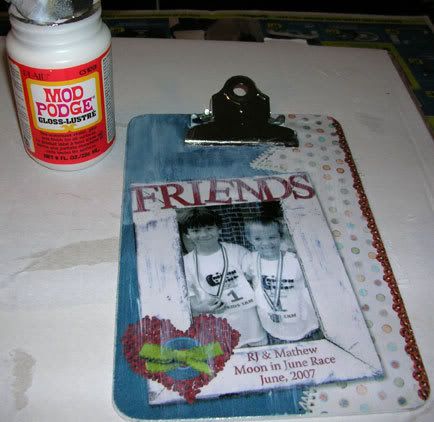
Step 4:
Ok so now that we have a DRY, painted clipboard it is time to adhere the cardstock to the front. Cover the clipboard with modge podge making sure you get the edges really well so you do not get any bubbling when you put the top coat on.

Step 5:
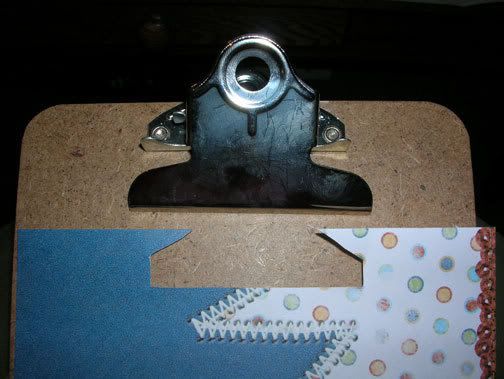
Now line up your cardstock with the clipboard and stick it down. Smooth out any bubbles and make sure all your edges are stuck down. Once your layout is “stuck” you can take some sandpaper and distress the edges of your paper a little like I did or you can leave it as a clean cut line.

Step 6:
Now you are ready to do a top coat of modge podge. Be careful that you don’t use too much or else you may ruin your layout/photo. Same as with the paint, try and use long even strokes so that it looks nice when it dries. (You don’t have to use the glossy stuff)
And now its time to wait again. You really don’t want to rush this step or you could ruin your whole project.
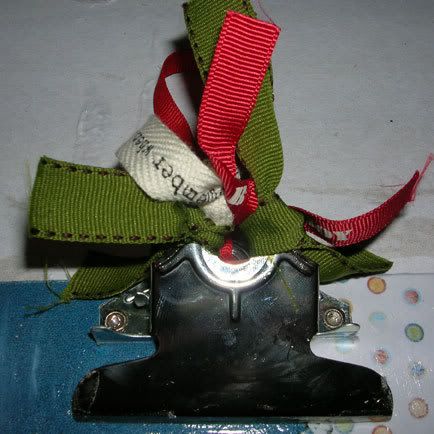
Step 7:
Now that its all dry you can add some ribbon to the clip and use rope or ribbon to make a loop to hang your masterpiece with.
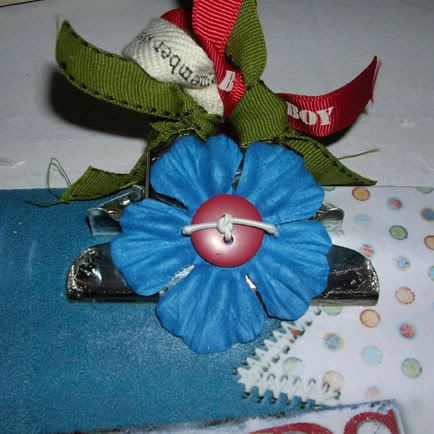
Lastly I added a flower and button to the clip so that your eyes are drawn to the photo and not the nice shiny clip!
Thats all there is to it. You can experiment with a variety of different ways to do this project. You can print out a bunch of digital papers and elements and adhere them separately to add dimension to the clipboard if you wish. Just have fun!